Introduction
This guide will help you log into the Veeam Availability Console and install the necessary tools you need to start a backup job. We will also show you how to configure both tools to meet your requirements.
Perform the steps below on the computer that you want to back up, unless stated otherwise.
Prerequisites
- Veeam Availability Console credentials phoenixNAP provided
STEP 1 – Log in to the PhoenixNAP Veeam Availability Console (VAC)
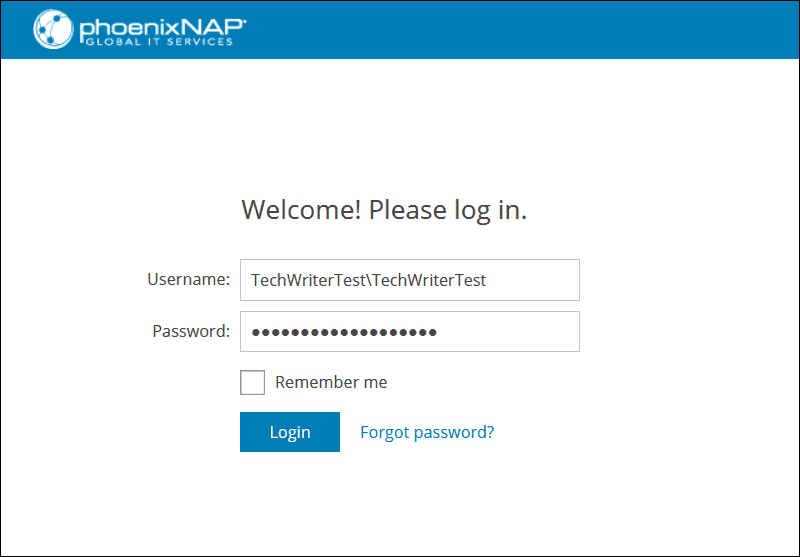
1. Navigate to https://phxvac.phoenixnap.com/
2. Enter your username in this form: CompanyUser. (For example: MyCompanyChrisP)
3. Enter the password. Optionally, select the “Remember me” checkbox.
4. Click Login.
The next screen takes you to the summary page of the console.
STEP 2 – Install Veeam Management Agent
Veeam Management Agent lets you remotely manage and monitor your Veeam Backup and Replication servers.
To install the agent:
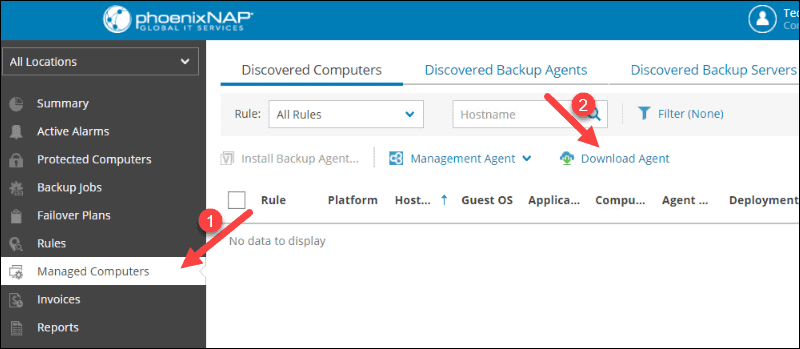
1. In VAC, select Managed Computers and click Download Agent.
2. Save the file to the desired location on the computer. Depending on the settings, the file may be automatically saved in the Downloads folder.
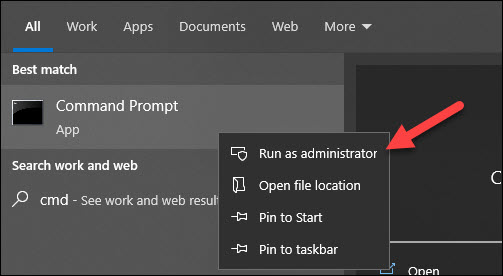
3. Open the Command Prompt as Administrator and navigate to the folder where you downloaded the file.
4. Run the .msi file, the name should be ManagementAgent. The installation wizard starts.
Note: The server you are backing up needs Microsoft .NET Framework 4.6 or higher. The installer will prompt if any services or an OS reboot is needed. Please confirm if you get such a pop-up.
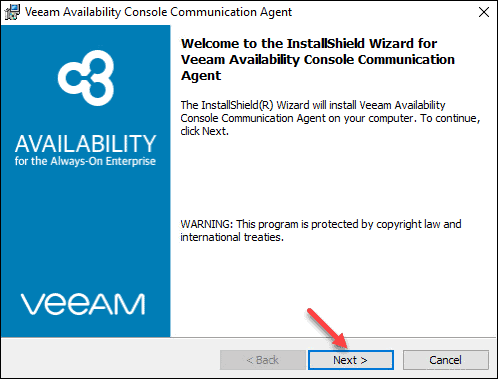
5. Click Next on the first screen.
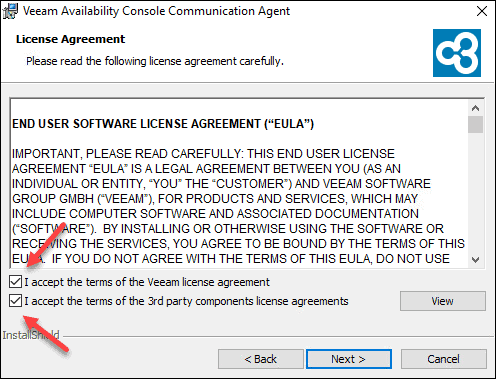
6. Select both boxes “I accept the terms…” if you accept the license agreement and click Next.
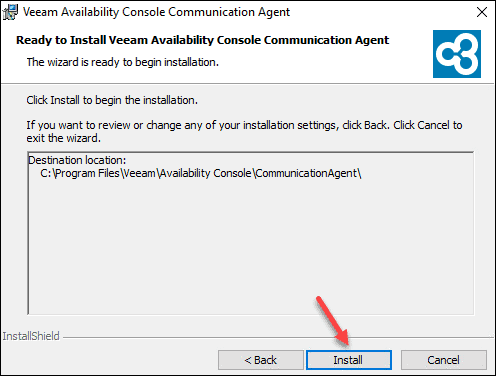
7. Click Install and wait for the installation to finish.
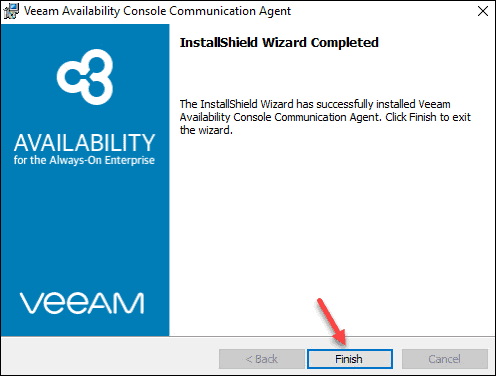
8. Click Finish when the Wizard completes the installation.
The agent should start in the background.
STEP 3 – Configure Management Agent Connection
To establish a connection between the Management Agent and the VAC, follow these steps:
1. Find the Management Agent icon on the right side of the taskbar, next to the clock.
2. Click the arrow if the icons are hidden. Then, right-click the Agent icon and select Agent Settings.
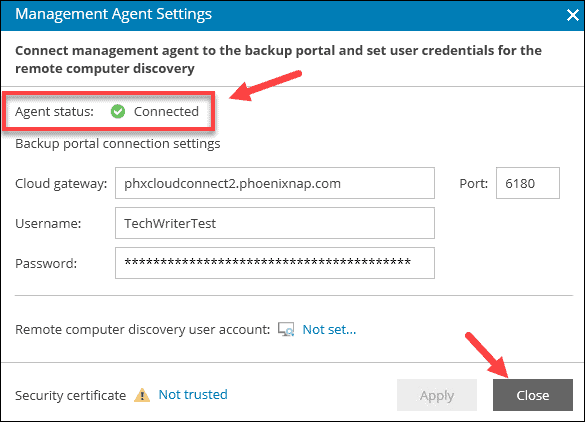
3. In the connection configuration window, use the following settings:
Cloud gateway: use one of the FQDNs as a gateway, depending on the server location:
For Phoenix: phxcloudconnect.phoenixnap.com or phxcloudconnect2.phoenixnap.com
For Ashburn: ashcloudconnect.phoenixnap.com
For the Netherlands: nldcloudconnect.phoenixnap.com
For Atlanta: atlcloudconnect.phoenixnap.com
For Singapore: sincloudconnect.phoenixnap.com
Port: Enter the default port 6180. It is grayed out, so you need to type it in.
Username: Enter your username without the company part. Refer to the screenshot below.
Password: Enter your password.

4. Click Apply.
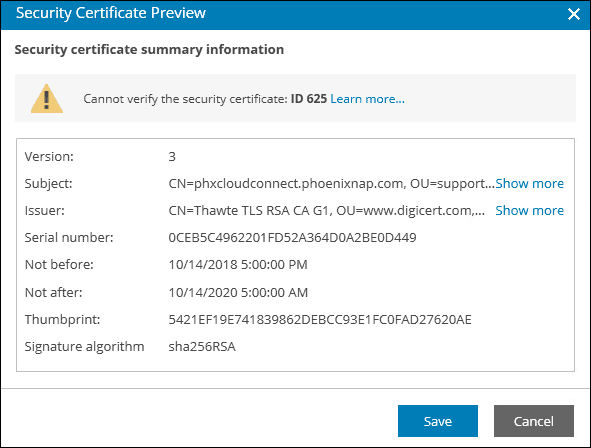
5. The connection should be established. If you get a certificate error ID 625, then an IP address was used. Use FQDN to resolve the issue. Click Save on the Security Certificate Preview window.
6. Click Restart to apply the settings and wait until Veeam Management Agent restarts.

7. Click Close to exit the settings window when the process completes. The agent status will be green and read Connected.
The Management Agent icon in the system tray should no longer have an exclamation mark or a red X.
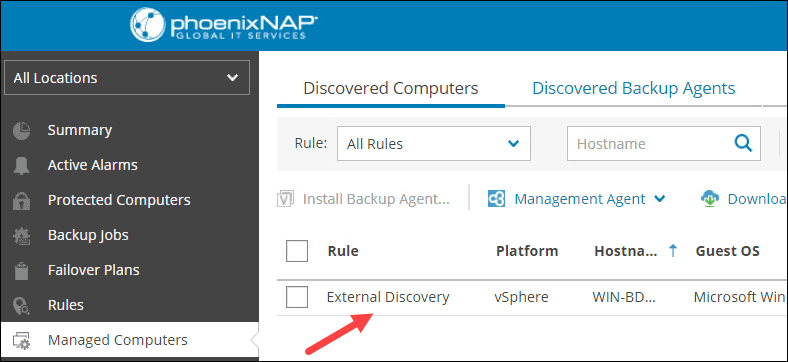
When you reload the Managed Computers page in VAC, the machine appears on the list.
STEP 4 – Install Veeam Backup Agent
Veeam Backup Agent allows you to perform an easy and secure backup of a machine to another location.
To install Veeam Backup Agent using the console:
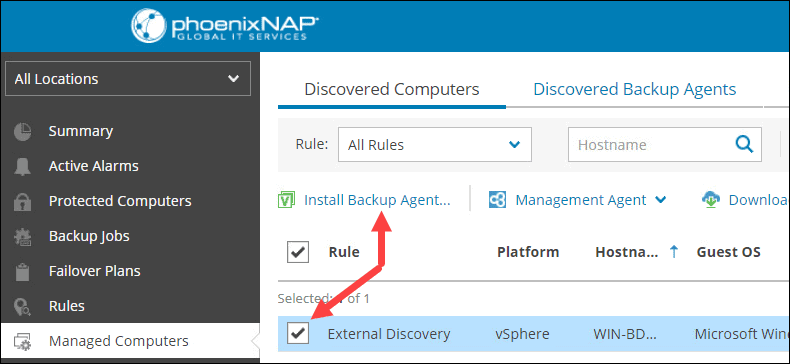
1. Navigate to the Managed Computers screen.
2. Select a machine and click Install Backup Agent.
3. Specify the credentials to use for the guest OS. You can leave the selection to “Account specified…”
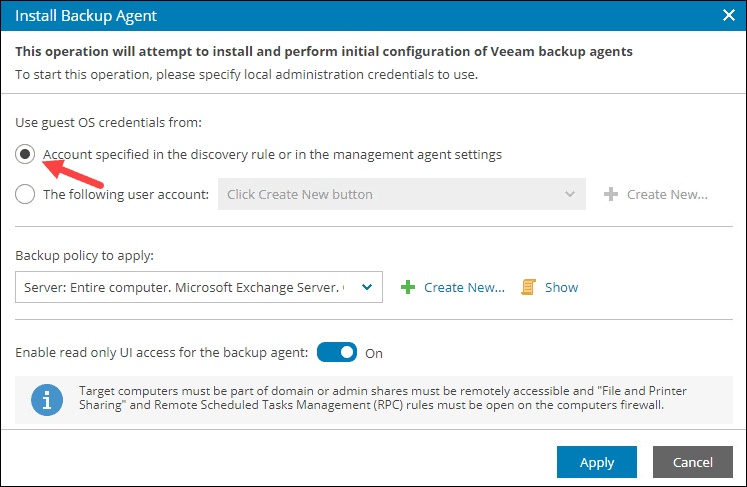
You can also select to specify a user account from the drop-down list or Create New.
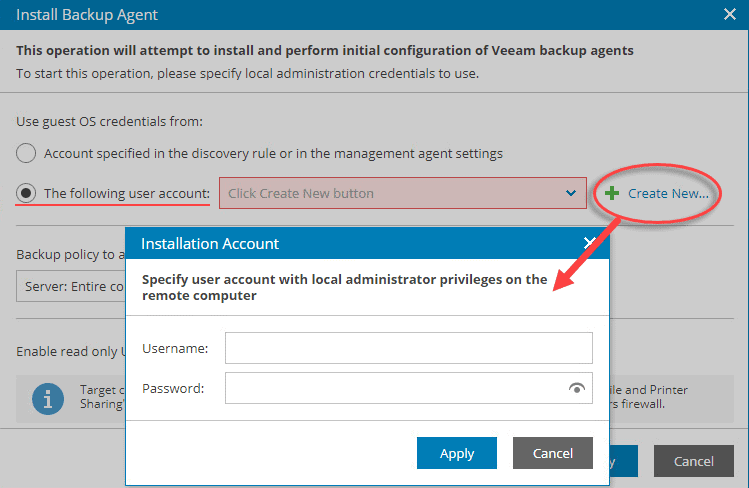
Specify the credentials in the form Companyuser and click Apply.
4. Choose a Backup Policy from the list. The default selection backs up your server daily.
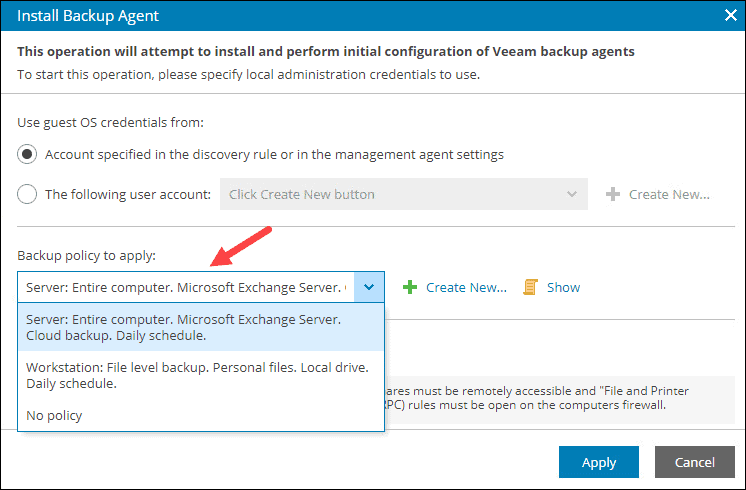
Optionally, you can create a new back up policy and go through detailed configuration.
5. Click Apply after you select a backup policy.
The deployment of Veeam Backup Agent will start on the machine you selected. You can view the progress in the Managed Computers screen. The process is complete when Agent Deployment says Success, and the progress bar reaches 100%.

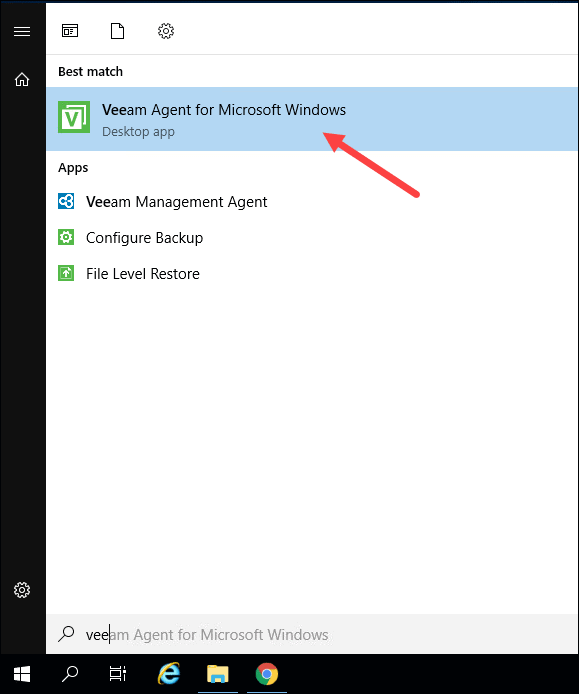
If you search for the agent on this machine, it will show up in the results:
STEP 5 – Configure Veeam Backup Agent and Start a Backup Job
To configure Veeam Backup Agent, you can log into the VAC from any computer. This step does not require you to log in from the computer you want to backup as was the case in previous steps.
To manually start a backup job:
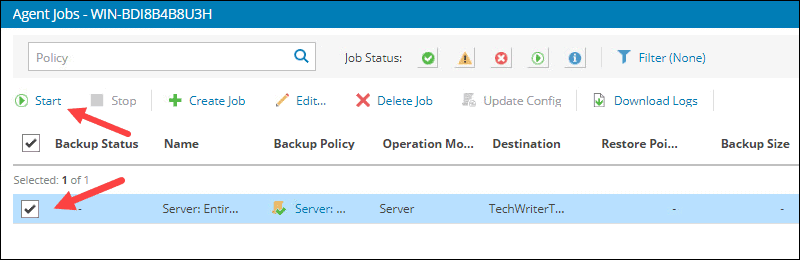
1. Select Backup Jobs on the left side of the console.
2. Tick the box next to the desired machine. So far, we have one.
3. Click 0 of 1 (the numbers may change) under the Successful Jobs heading.
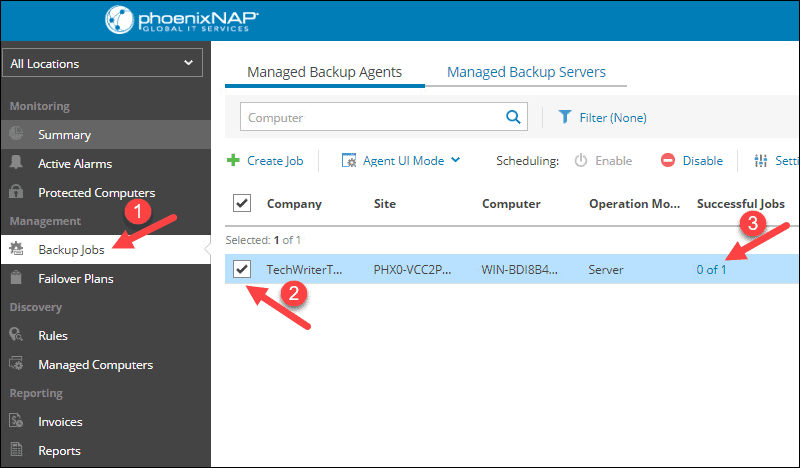
The Agent Jobs page loads.
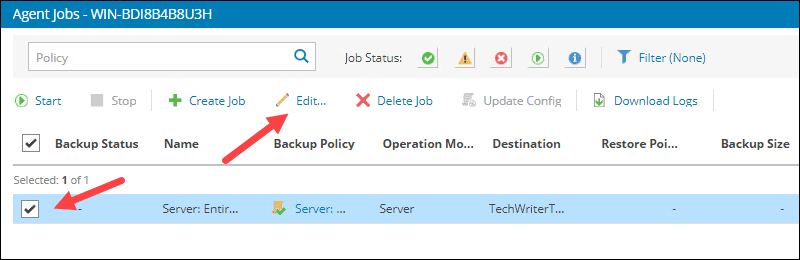
4. Select a job and click Edit… if you want to change the job configuration.
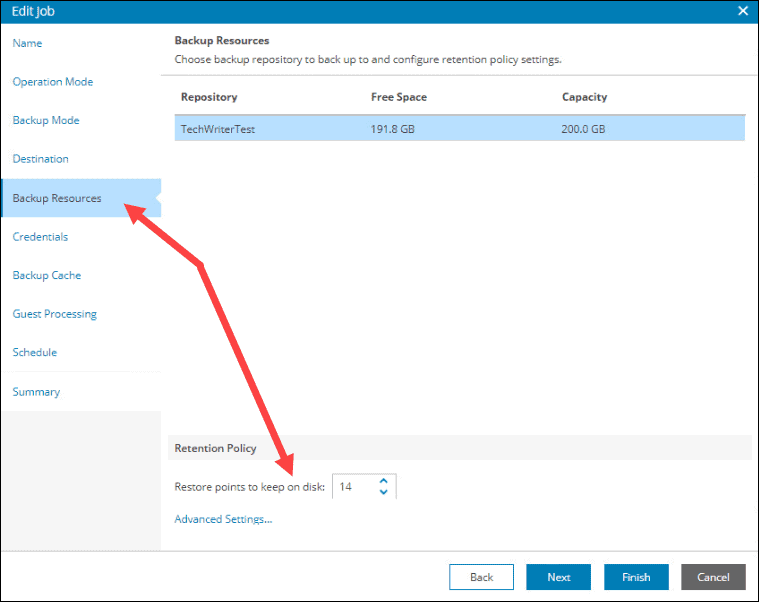
5. To save disk space, reduce the number of restore points to less than 14 in the Backup Resources -> Retention Policy section.
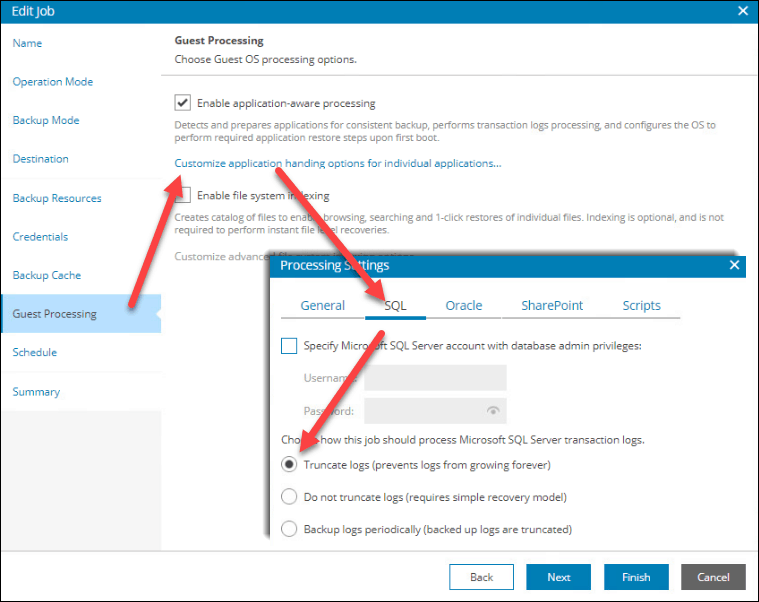
6. For a server running a database, you can Truncate logs. Navigate to Guest Processing -> Customize application handling options for individual applications and select Truncate logs under the SQL tab.
7. To change when a backup job starts automatically, navigate to Schedule. Set the time and options for automatic retries.
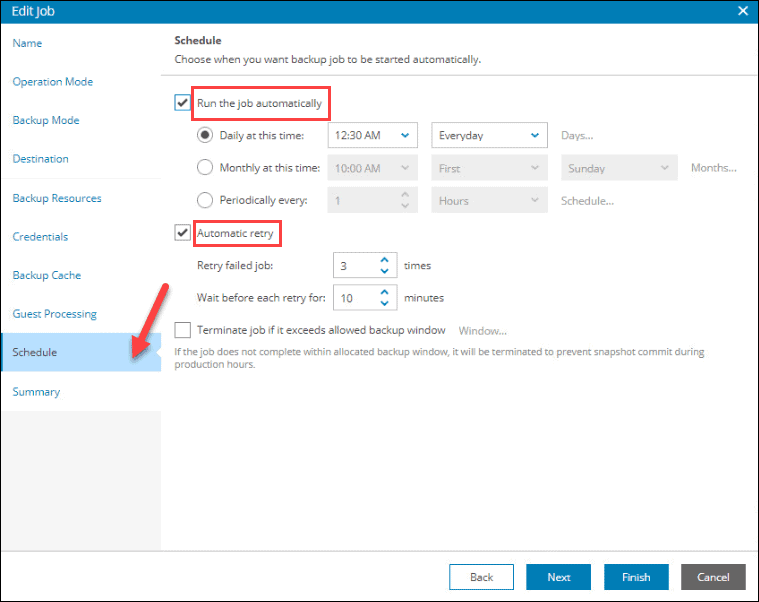
8. Click Finish when ready.
9. Finally, click Start to begin the backup job for the selected machine.
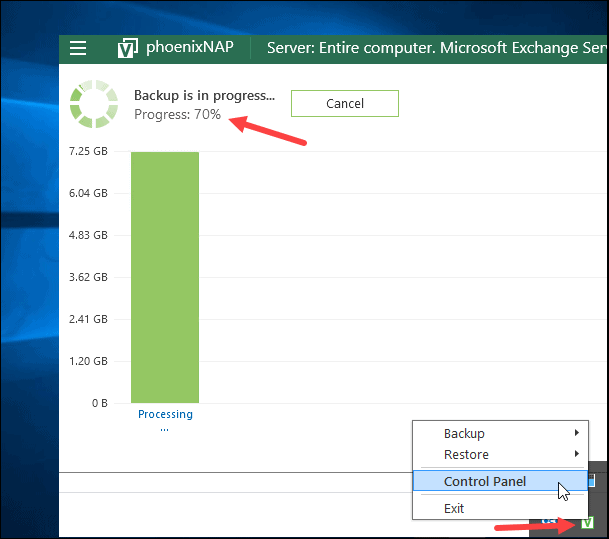
The console will show a progress bar, but you can also track the progress and status on the machine you are backing up. Open Veeam Agent Control Panel from the system tray or start menu to see the details:
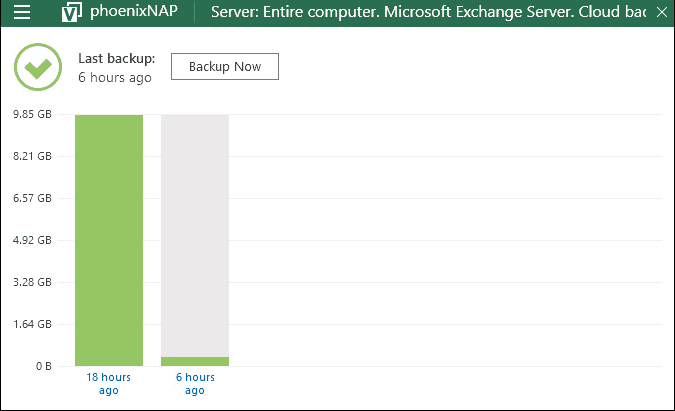
All current and future backups will appear in the Veeam Agent Control Panel.
Conclusion
The steps in this article helped you install and configure Veaam Management Agent and Veeam Backup Agent using Veeam Availability Console.
For more details on how to use the VAC, refer to our Quick Start Guide.
